As further discussed in Printing Fence Logs and the Fence Log Tutorial, some fence log settings may be defined in the template to be used as default values, which may be overridden by the data in the project file.
To edit the fence settings for a particular template, right click
the template and select "Edit Fence Settings" to display the fence
screen, which is divided into three tabs.
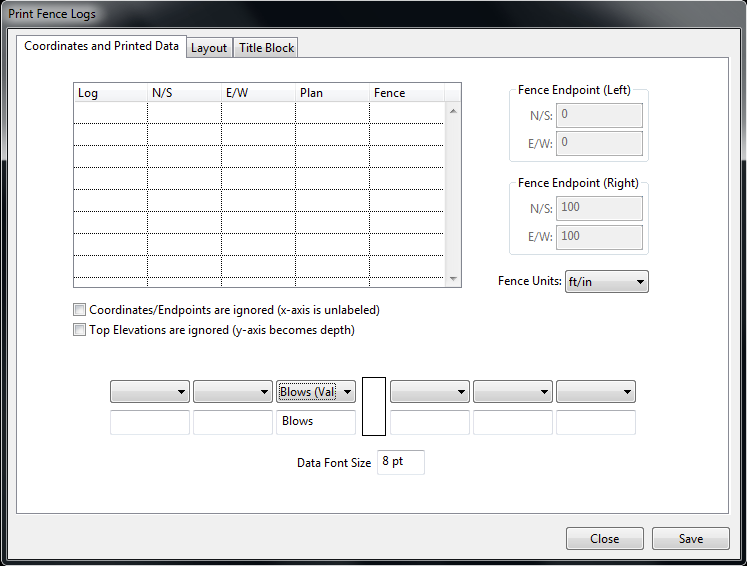
Near the bottom of the screen, a schematic
of the fence log is shown in the middle with three columns to either
side. These are the default data displayed on the fence diagram
next to each log. Items such as blow counts (value or graph),
material types, etc. can be selected to print next to each log.
Although these values can be changed during printing (and saved in the
log as override values), if most fence diagrams include a specific data
type, it is helpful to save it in the template.
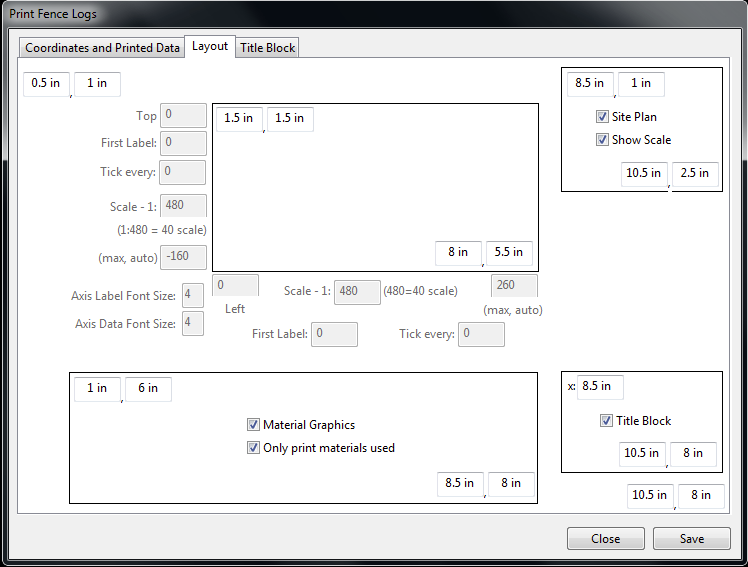
Values that can be saved in the template are the coordinates of various areas on the fence log. In the far upper left and lower right, you can change the overall boundaries of the log (the frame is drawn to these boundaries).
Inside the frame are the log area (note
that the axis editfields are not editable until you print the fence),
the site plan (shown in the upper right), the title block (shown in the
lower right), and the material graphics log section. The site
plan, title block, and key can be completely turned off by unchecking
the appropriate box.
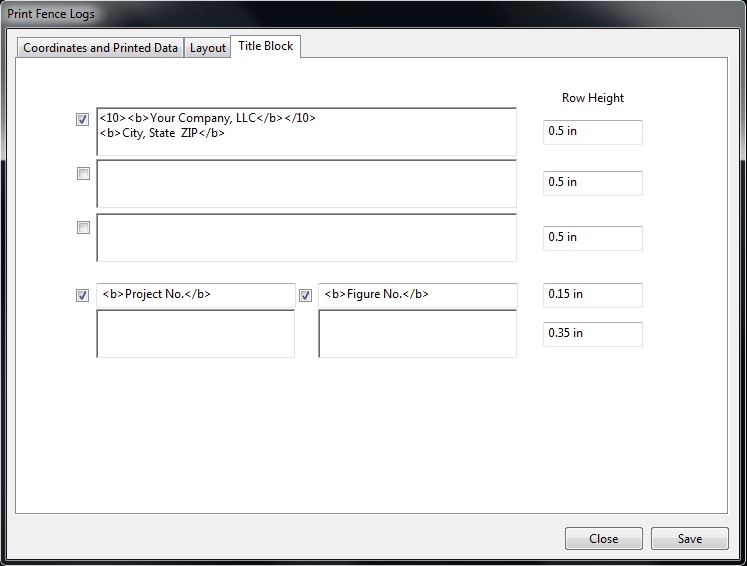
The default values for the title block are stored in the template, but can be overridden during printing. This is useful for storing the company name and address, a default figure number, and also project-specific information if a specific template is generated for each project.
The height of each individual section in the title block can be adjusted by the "Row Height" column. If a specific block is not to be printed, uncheck the box to the left.
The final tab on the fence settings is "paper size."
All of the coordinates input in the fence settings dialog are based on the "Design Paper Size." For "Letter," the width is 8.5 inches and the height is 11 inches. Landscape pages are denoted with a capital "R" at the end of the size ("LetterR" is landscape "Letter").
After designing the page based on the design size, you can choose to print the page using a different size, letting the software scale the input coordinates. If you design the pages based on "Letter," you can then easily print to "Ledger" by changing the "Output Paper Size" to "Ledger."
Note that any scale you have input will be affected by printing to a
different size paper than you designed to. For instance, if you
design the page (and set the scale) based on letter size paper but then
print to ledger paper, both the horizonal and vertical scales will be
stretched to fit the new paper size. If you want the scale to be
what you set, you need to output to the same size paper that you design
for.