Editing Materials
To add or edit material types and the way they appear on the logs
and key, click Tools-Edit Materials on the
main toolbar to display the Materials Manager.
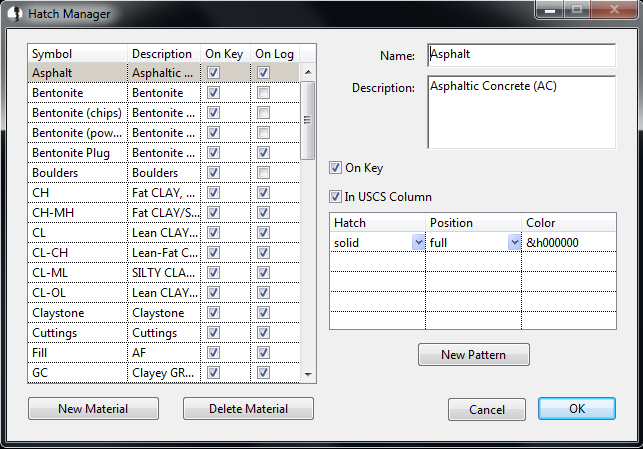
Click "New Material" to begin entering a
new material type, or select the desired material type to edit (Asphalt
has been selected above).
- Name
- The name displayed when entering soil layers and well
backfill types.
- Description
- This description will be printed on the key next to the name, if
"On Key" is checked.
- On Key
- If checked, the material name and description will be printed on
the key next to it's graphical patterns.
- In USCS Column
- If the material name is NOT to be printed in the USCS column (for
instance, if the name is very long), uncheck this box.
- Hatch
- Each material type can be represented by any combination of hatch
patterns. Each pattern can be printed in a different color across
the full column, only the left half, or only the right half. Use
the pulldown box in the Hatch column to select from the available hatch
patterns. Similarly, use the pulldown in the Position column to
define where the hatch will print (full, left, right). Clicking
in the color column displays a color picker for that hatch
pattern. To add a new hatch to the existing material, click "New
Pattern." To delete a hatch, right click the row and delete it.