In this tutorial, we will continue where we left off in the "Basic Log" tutorial and add a second log to the project.
Before you begin, start BorinGS by double clicking (or single
clicking, depending on your
operating system settings) on the BorinGS icon. If the software
has been registered, the main entry screen will be displayed.
When starting the trial version, a "nag screen" must be dismissed first.
Open the previously saved file by clicking "File-Open" from the menu, or clicking the "Open" button on the toolbar. Navigate to the data file (we called it "tutorial.bgs") and click "Open."
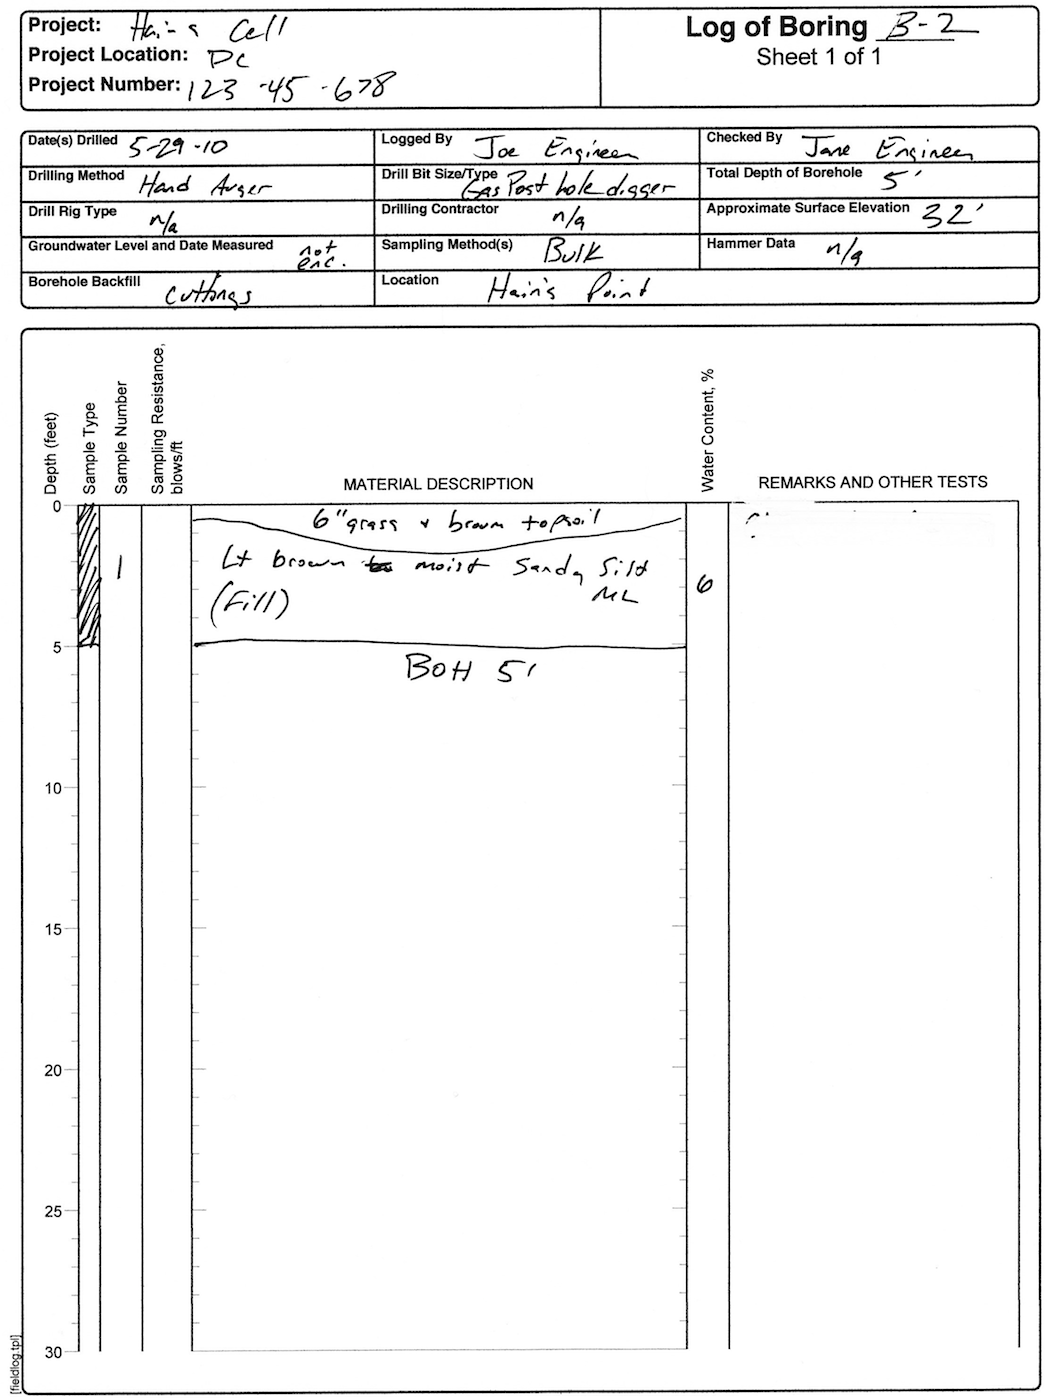
We will be adding data from the field log shown below. It is from the same project, so including it in the same data file as B-1 makes sense.
Our project file currently has only one
log in it (B-1).
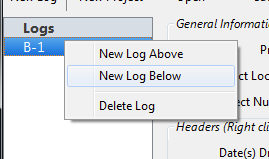
Adding a second log is easy - right click your log in the log list and
select "New Log Below" to create a new log below B-1. Once the
new log is created, click the "New Log" text to select it, and the new
log will be displayed.
We will be prompted to copy the project
information, create a blank log, or copy all the project information
and the headers. As this log is for the same project, but is a
different type of log, we will select "Copy Project Info."
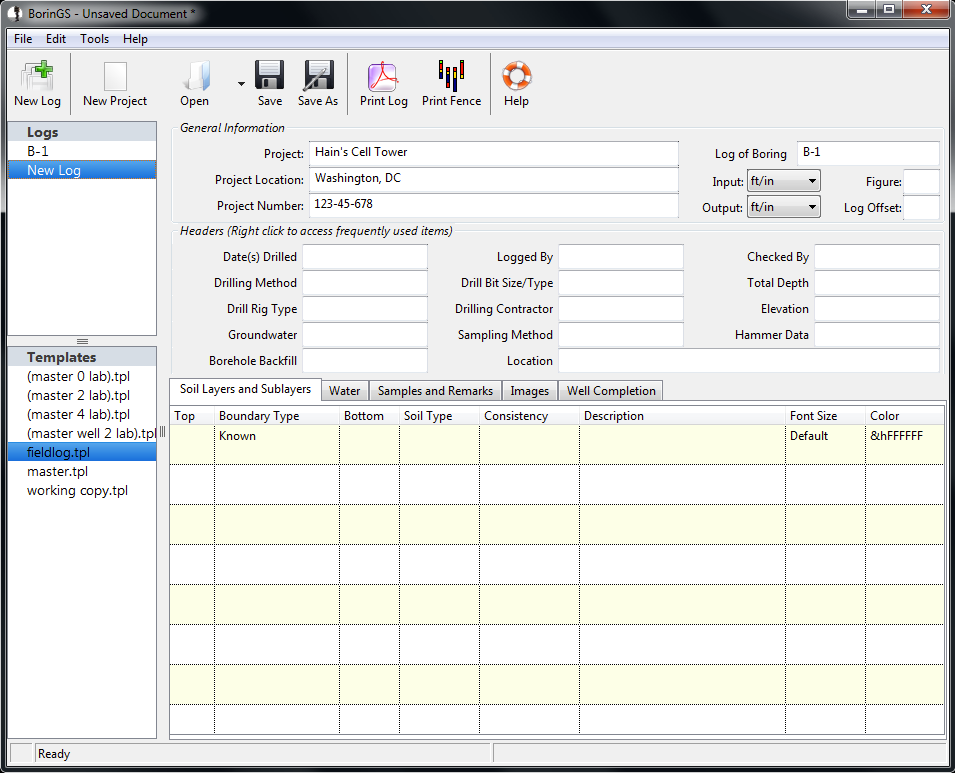
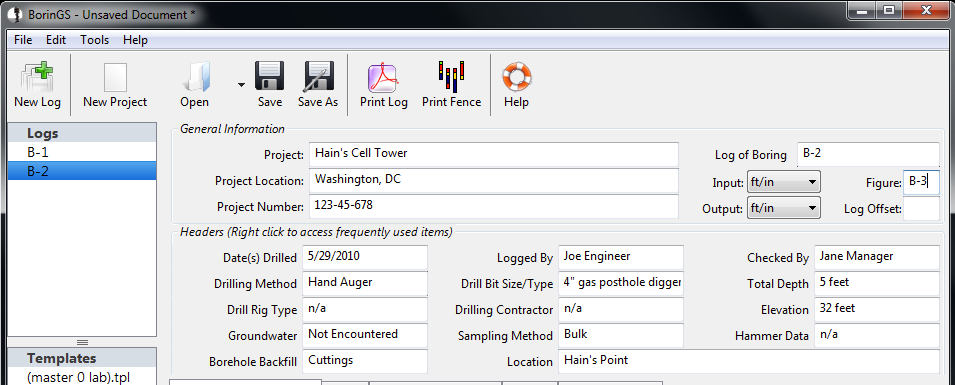
The process of entering the General Information and Headers is essentially the same as we used in Boring B-1. Enter the data, either using the quickfill method or directly typing the information into the data fields. When finished, the entry screen should look like below.
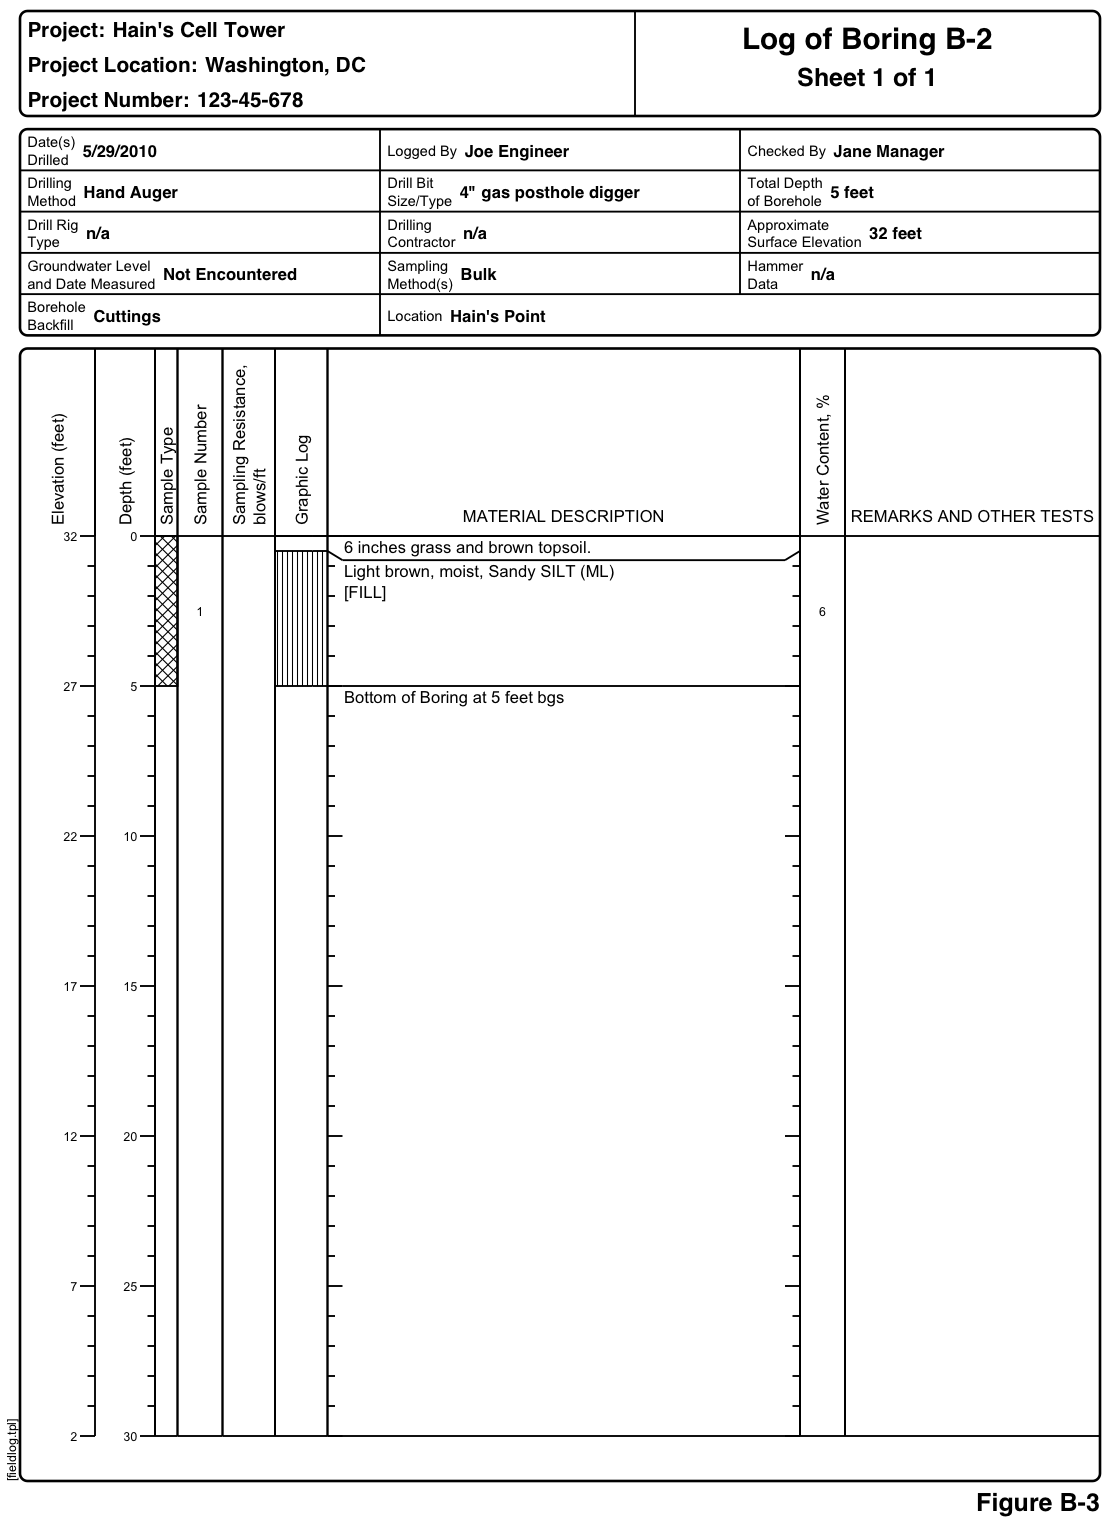
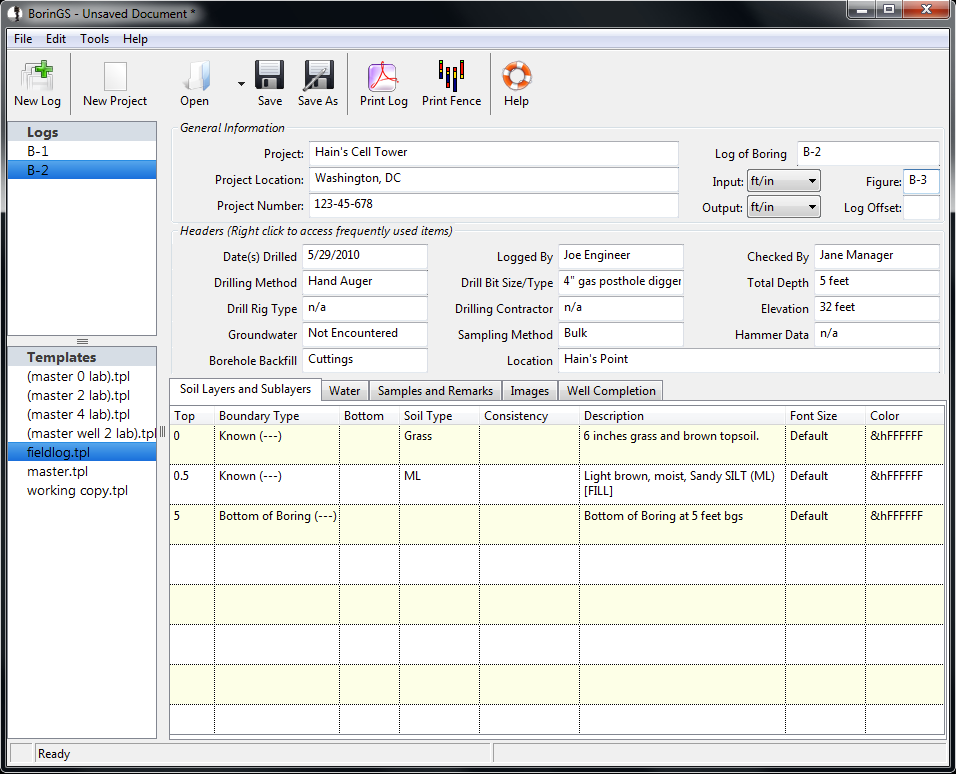
As this is a shallow hand-auger boring, the log is fairly simple to enter. There are two layers, the first at 0 feet and the second at 0.5 feet. The final layer to enter is at 5 feet, and is the Bottom of Boring. When finished, the layer entry area should look like this:
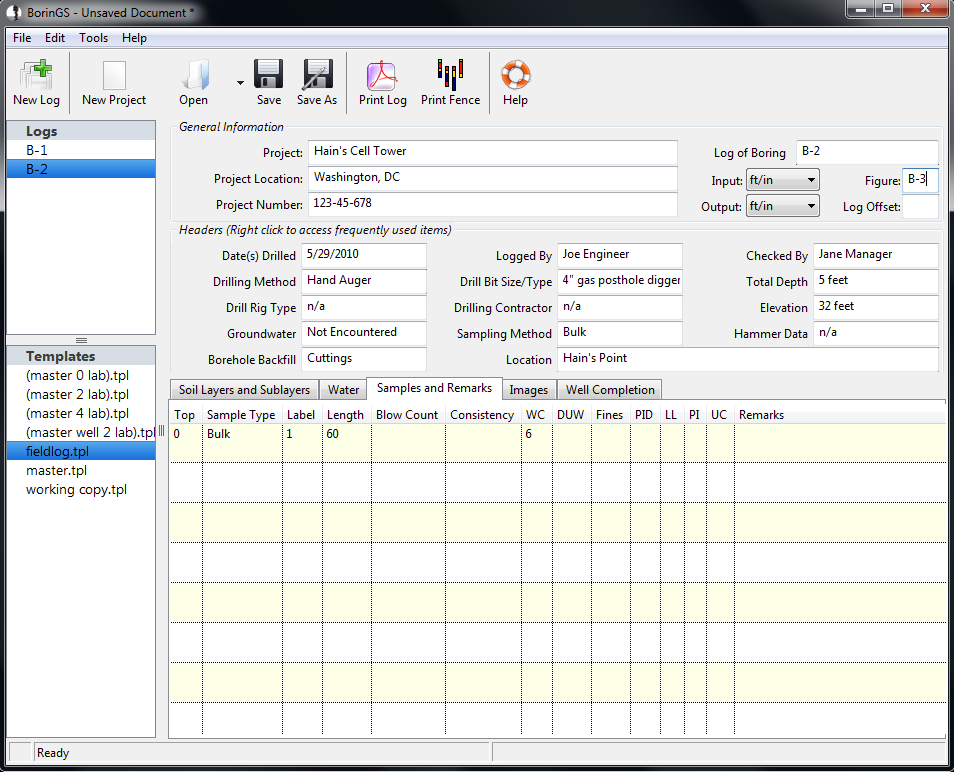
There is a single bulk sample from this log, sample ID "1", from 0 to 5 feet (a total length of 60 inches). The water content was 6%, as shown in the sample entry below.
Prior to printing, make sure that our "corrected" template has been selected by clicking "fieldlog2.tpl" (see Creating a Basic Boring Log/Fixing Groundwater Placement for details on creating the fieldlog2.tpl file).
You can print Boring B-2 the same way you printed B-1 (by selecting File-Print), or you can print both logs at once. To print all the logs in a given file, select File-Print All Logs. The generated PDF file will contain the key, log B-1, and log B-2. From the PDF viewer you can either save the PDF file or print it to your attached printer. Log B-2 should look like: