In this tutorial, we will enter data for a very simple log, customize the template, and print the log.
Before you begin, start BorinGS by double clicking (or single clicking, depending on your operating system settings) on the BorinGS icon. If the software has been registered, the main entry screen will be displayed. When starting the trial version, a "nag screen" must be dismissed first.
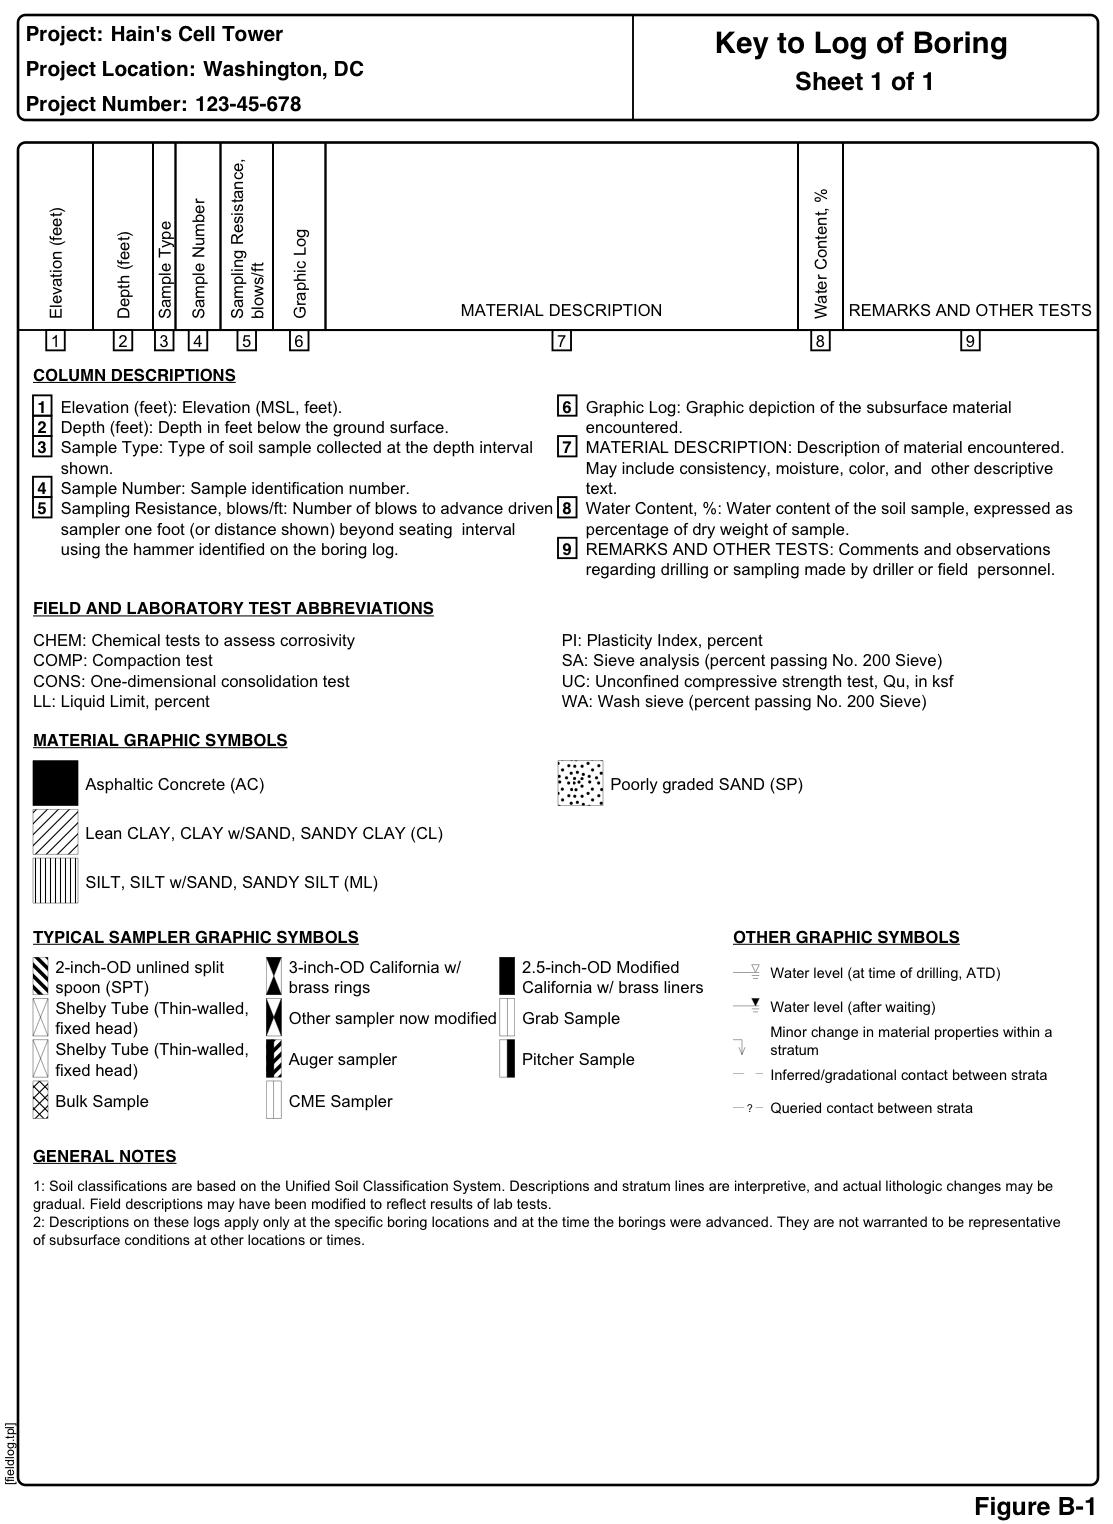
To help aid field personnel in logging the boring, we will print blank logs for them to take in the field. With a blank log open, select the "(master field).tpl" template and click "File-Print" (or select the "Print" button on the toolbar). A dialog will ask how many feet of log are to be printed. We will be drilling a 20 foot borehole, so keep the default of "30" and click "OK". The blank log will be displayed in your PDF viewer. Print as many copies as are needed.
![]()
Upon completion of drilling (and laboratory testing), we got the following from the field engineer (Joe Engineer). It has been checked by Jane Engineer and is ready for input:

General information about the boring consists of the Project,
Project Location, Project Number, and the Boring Designation.
Enter these values from our sample field log as shown below. We
will be calling this Figure A-2 (see the "Figure" entry below).
Also note that you can change the input and output units in this
section. Because our log was taken in ft/in and will also be
output in ft/in, no changes are required. We will discuss the
"Log Offset" in the well tutorial.
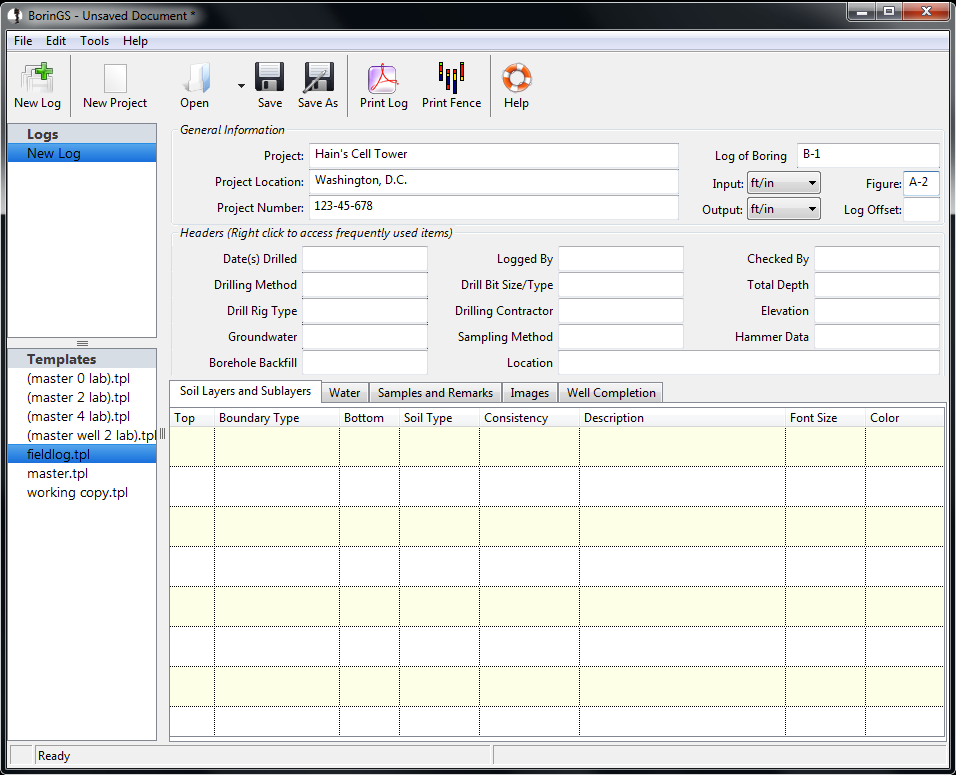
The headers section consists of the remaining borehole information that is printed above the log. You can either type the data directly into the fields, or use the built in calendar and "quickfill" entry methods. We will do both.
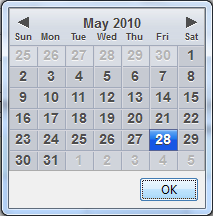
To quickly enter a date, right click the date entry field and select "Calendar" to bring up the onscreen calendar. Click the arrow to the left of the month until May 2010 is displayed. Click on the 28th and then OK. The date will be inserted into the field.

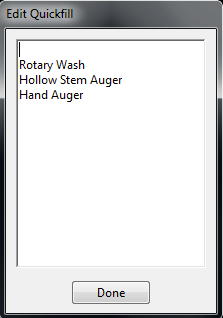
Because we often use the same types of drilling methods on multiple logs, we want to add some quickfill entries. Right click the Drilling Method entry field and select "Add/Edit" to display the editor, as shown below.
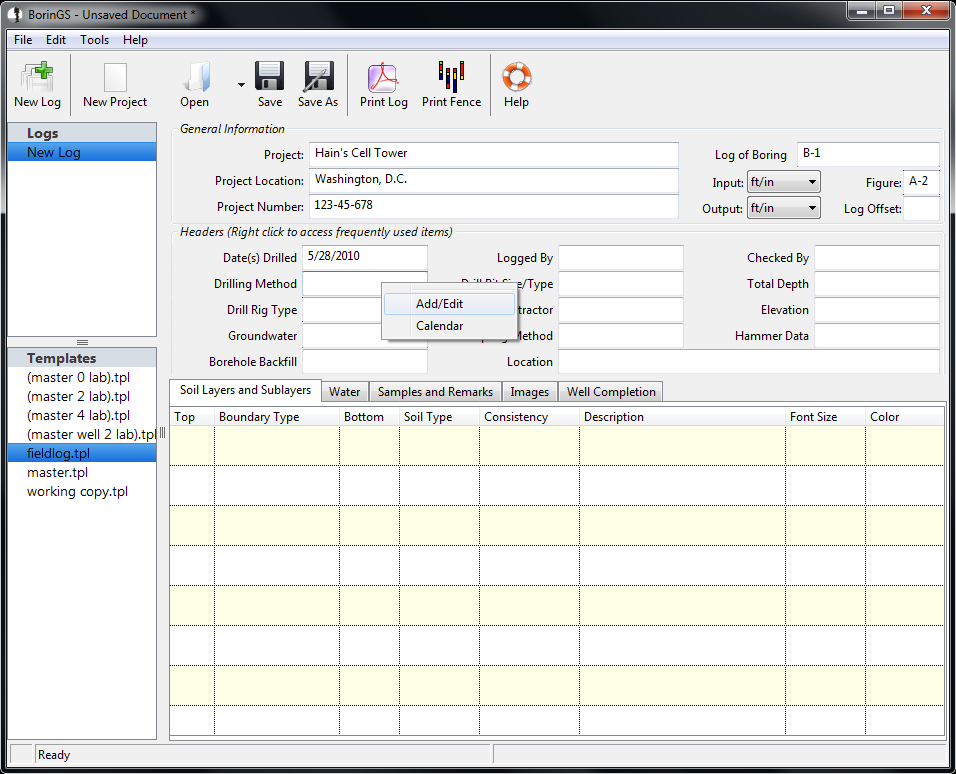
Enter the drilling methods used most frequently, each on its own line. We will enter "Rotary Wash," "Hollow Stem Auger," and "Hand Auger." Click "Done" to dismiss the entry screen.
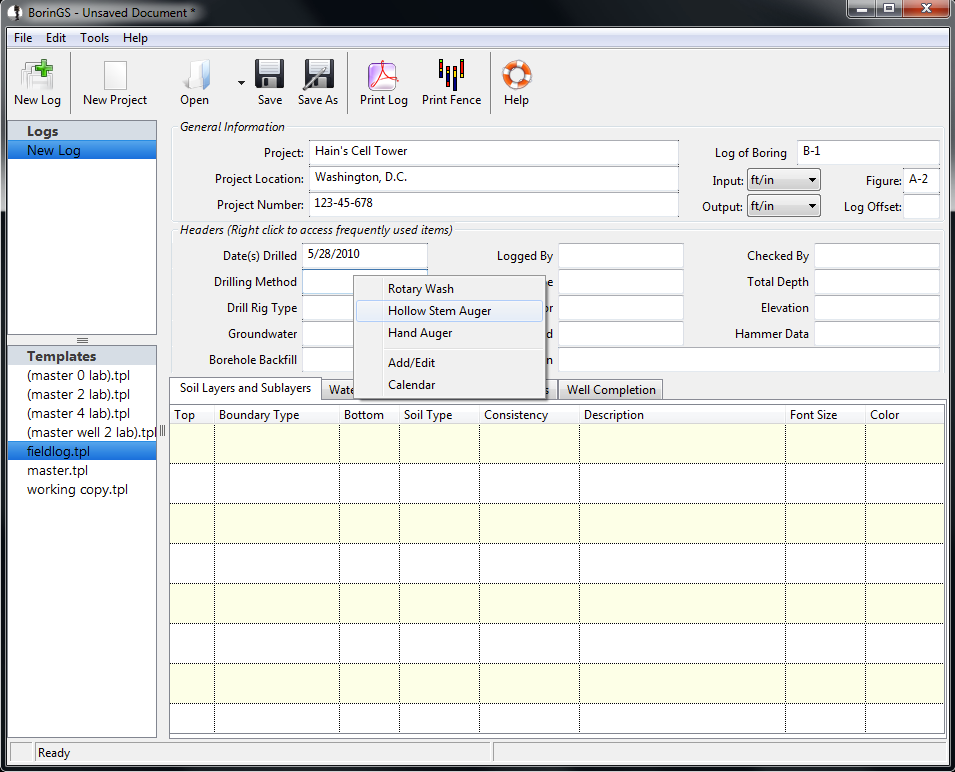
Now when we right click the Drilling Method field, we should see the three drilling methods we have entered. Select "Hollow Stem Auger" to fill the field.
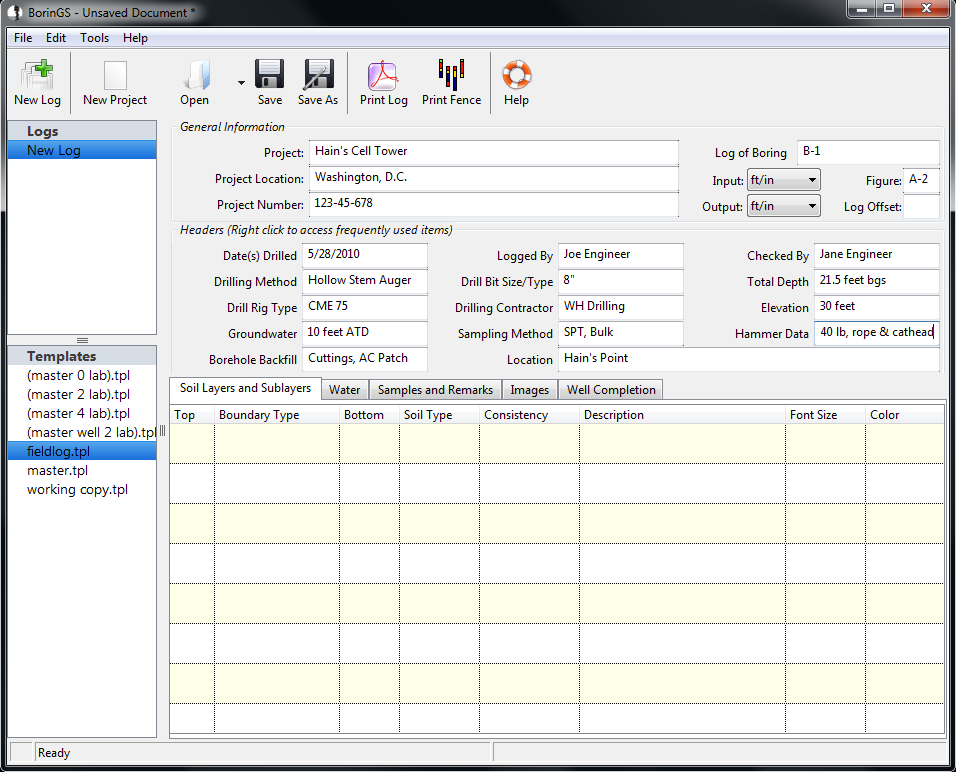
We will use the same method that we just used. Right click the Drill Rig Type field and select "Add/Edit." Notice that the drilling methods we just entered do not pop up - each remembers its own quickfill list. Enter your commonly used drill rig types, including CME 75 for this example. Click "Done" to dismiss, right click the entry field, and select "CME 75" to fill the field.
Because groundwater is not typically encountered at the same depth in many borings, we will enter the data directly. Click in the Groundwater field and type "10 feet ATD."
The rest of the fields are entered as the previous two. You can type the values in directly or use the quickfill menu. After entering all the data, the screen should look like the following:
Make sure the "Soil Layers and Sublayers" tab is selected, and then
click anywhere in the grid to open the soil layer entry screen, as
shown below after entering the first layer.
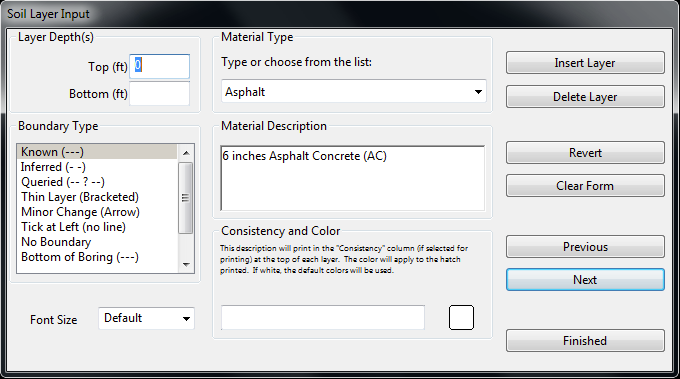
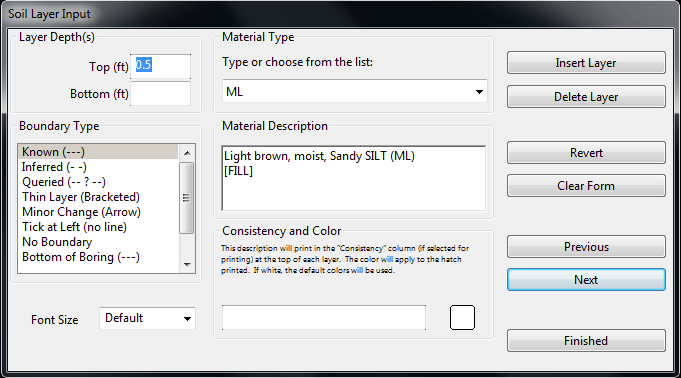
Click "Next" to enter the next layer. The "Top" value is 0.5 (feet), the boundary type is "Known" (a solid line), the material type is ML, and the material description is as shown.
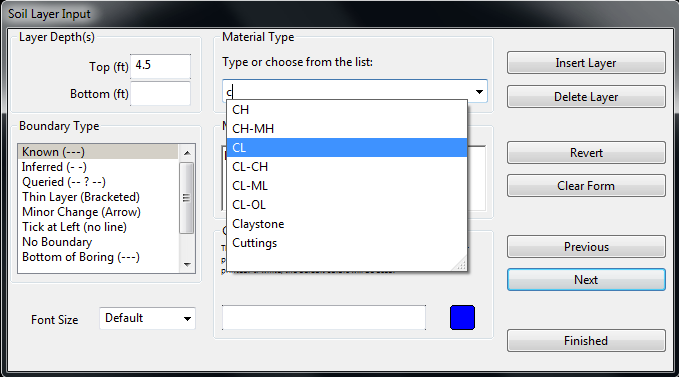
Again, click next to enter the third layer. Note that when
typing in the material type, a pulldown list is presented with all of
the defined materials that begin with the entered text. You can
either finish typing the material type, or select the appropriate type
from the pulldown list.
Continue entering data until you get to the bottom of the log. To terminate the boring data, you must enter a layer defined with a "Bottom of Boring" boundary type as shown below.

Click "Finished" to close the data entry screen, and save the data file.
We encountered water during drilling at 10
feet, so it is a good idea to display a graphical water symbol on the
log. Click on the "Water" data entry tab. Enter "10" for
the Depth. Click in the "Symbol Type" column to display the popup
menu, and select either "open" or "solid."

For this example, we will use "solid." Click in the Text column and enter the text to be printed next to the symbol which, in this case, will be "ATD," as shown above.
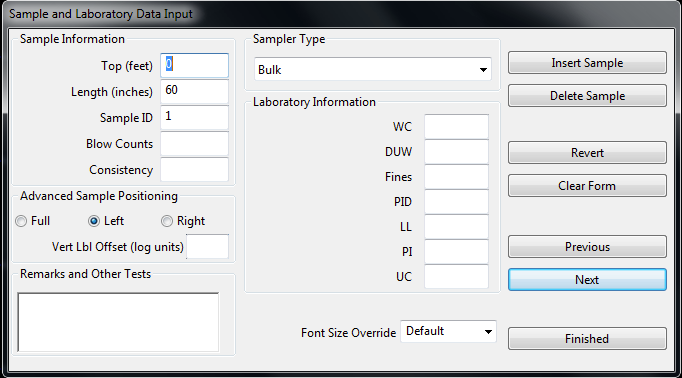
Begin by selecting the "Samples and Remarks" tab and click on the first row to display the sample data entry screen. Note that on our field log, the second sample (an SPT) is within the depth range of the first sample (a bulk sample). To enter these, begin by entering the data for the sample that starts first. The start depth is 0, the sample length (note that this is in inches) is 60, the sample ID is 1 (from the field log), and the sample type is "Bulk." You can either use the pulldown menu, as shown, or type the sampler type directly into the box.
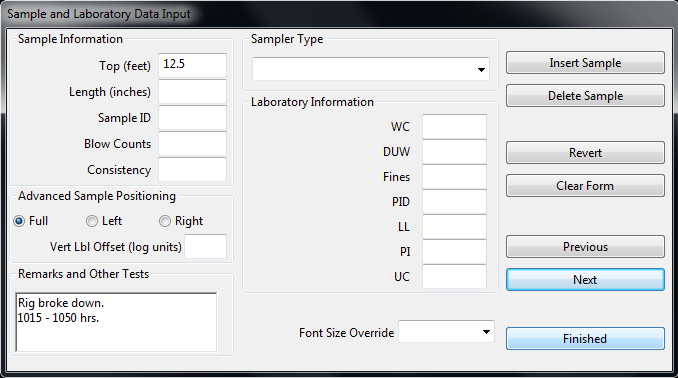
The last item requiring entry for this sample is under "Advanced
Sample Positioning." Because we want this sample to print on the
left side of the sample type column, select "Left."
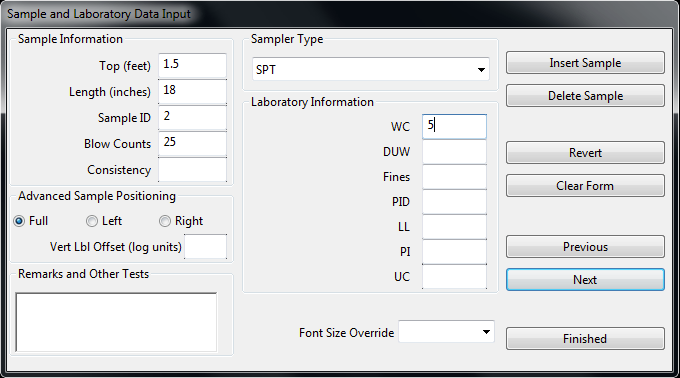
Click the "Next" button, or type "Enter" to finish with this sample
and begin entering the next. The
top is 1.5, the length is 18 (inches), the Sample ID is 2, type SPT,
and Advanced Sample Positioning is now "Right." This sample also
has some laboratory data associated with it: a water content test equal
to 5%. Enter this in theWC box as shown below.
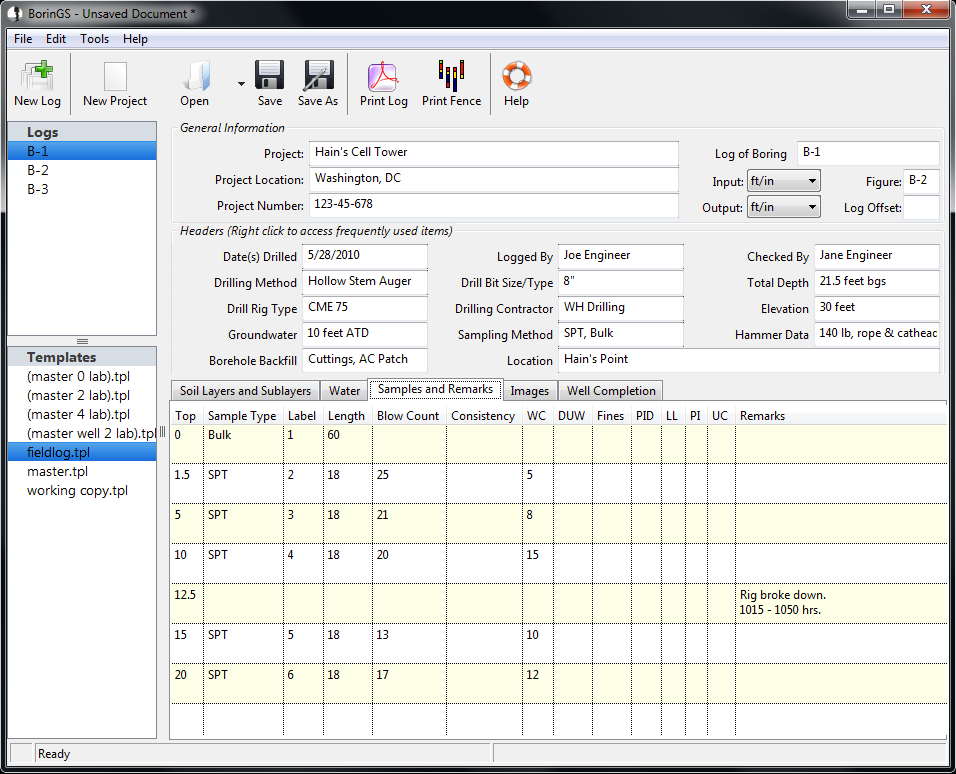
The rest of the samples should be entered in a similar manner, and when you are finished click the "Finished" button to close the entry screen. Your window should look like this:

Now, since we forgot to enter the remark at 12.5 feet, we need to insert it. We can either put it at the end of the samples (after the 20 foot sample), or we can insert it in the proper depth order. To keep things neat, we will put it between the 10 and 15 foot samples.
Click on the sample at 15 feet to display
the sample display screen, and then click "Insert Sample." This
will insert an entry in the sample list and reset the form.
Enter the depth at which you want the
remark to begin (12.5), and type the remark in the "Remarks and Other
Tests" field. This field can accept line breaks, so if you wish
the remark to be split into lines you can do so. Do not enter a
sampler type here, since we did not take a sample. Our remark
will look like the following.
Click Finished to close the entry screen, and our window now looks like this.
Don't forget to save the log!
At this point, we have the entire log entered, so we can preview the results using our basic "fieldlog" template. Select the File-Print menu, or click on "Print Log" on the toolbar to generate the preview. The lower left corner of the screen will indicate that the output is being generated, and the PDF will open automatically. Your log should look like below.
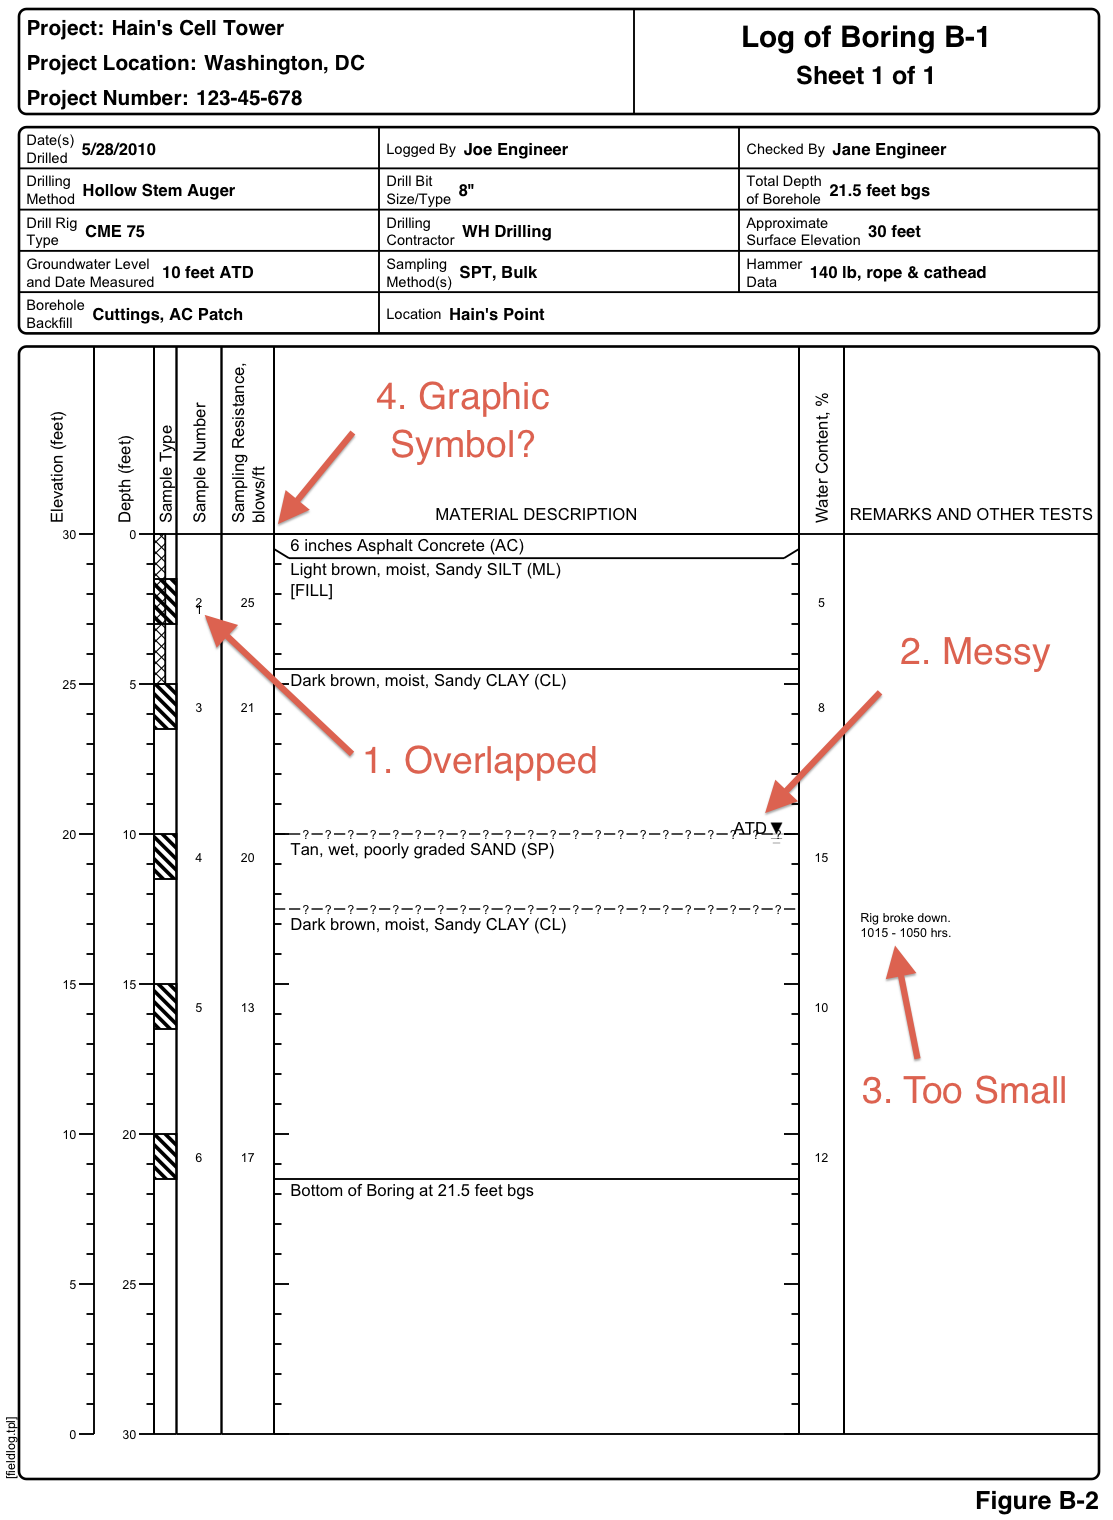
Note that the log has three main problems, as shown above.
To fix these issues, we need to edit both the data and the template.
Click on the "Samples and Remarks" tab and select the first row (containing the bulk sample). When the data entry screen comes up, notice the text field for the "Vert Lbl Offset" (vertical label offset). This value, entered in log units (in our case, feet), will offset the sample number. In our case we want to shift the sample up 2 feet, so enter "-2".
Click "Finished" to close the sample entry screen.
To move the water symbol, we need to edit the template. Right
click on the template we are using (fieldlog.tpl) and select "Copy
Template." When prompted enter the new filename -
fieldlog2.tpl. The two templates are now listed and are
identical. Right click on "fieldlog2.tpl" and select "Edit
Columns."
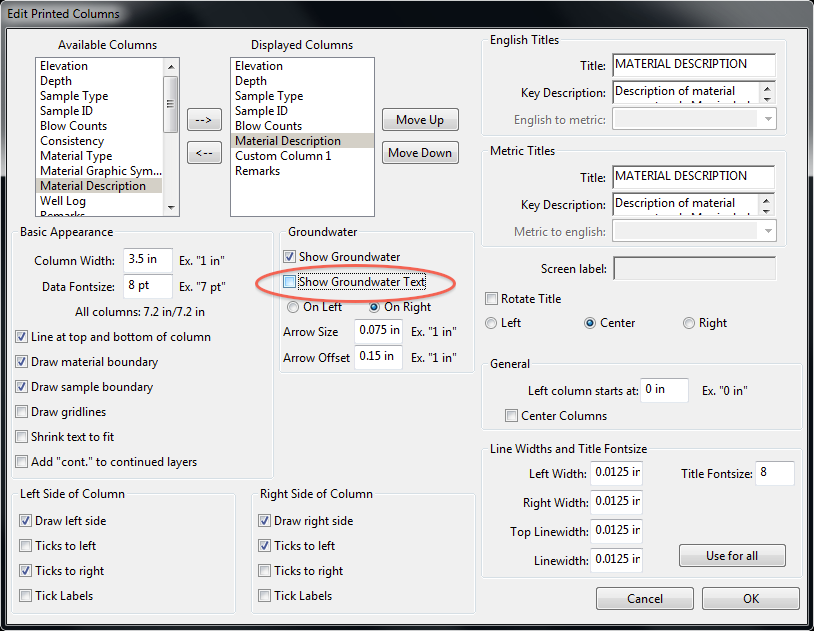
Note the area below the displayed columns titled "Groundwater." Each column can optionally display the groundwater icon and associated text. To remove it from the material description column, click on the displayed column "Material Description." Uncheck the box that says "Show Groundwater."
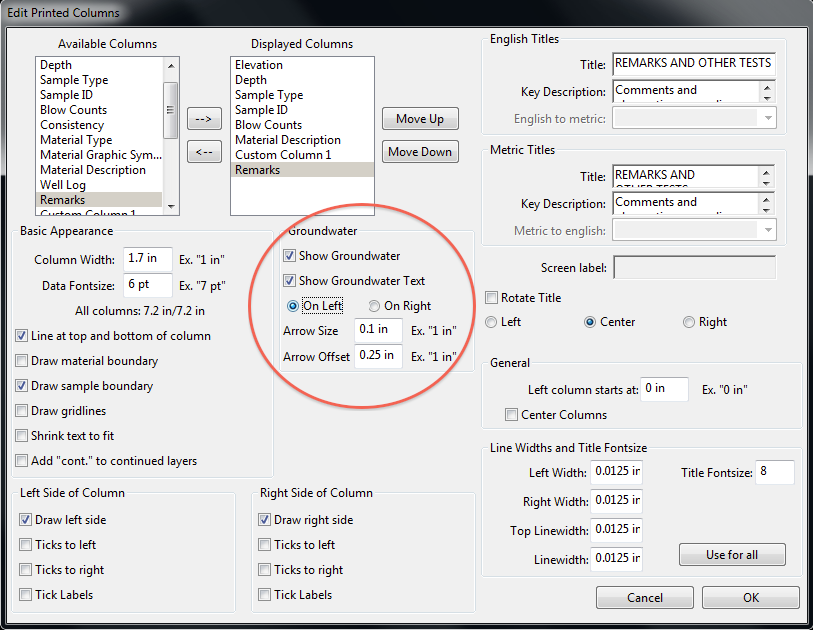
Now select the "Remarks" column and check the "Show Groundwater" and "Show Groundwater Text" boxes. Select "on left" and leave the other values at the default values. Click OK to save the template.
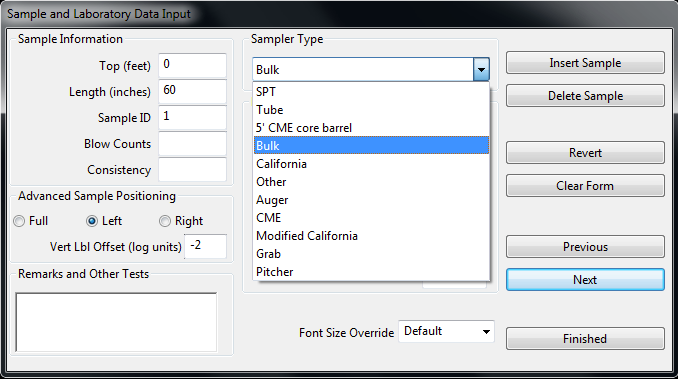
There are two ways to fix the font size of our remark. The first is to adjust the "Font Size Override" on the sample entry form, as shown below.
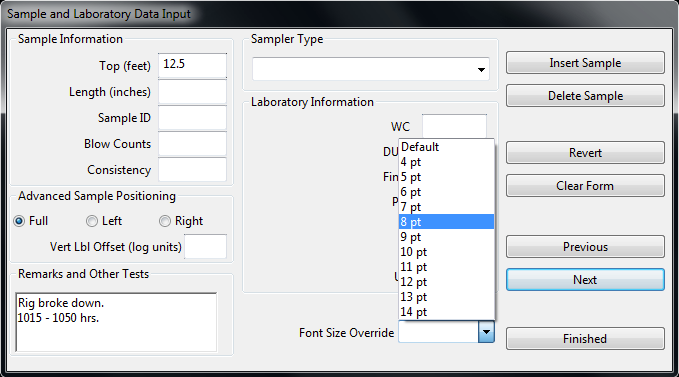
This has the advantage of being easy for our case, since there is only one remark. The disadvantage is that for a log with numerous remarks, you would have to adjust the font size many times.
To fix this issue for all remarks, we will edit the template. Leave the remark's font size at "Default" and click Finished.
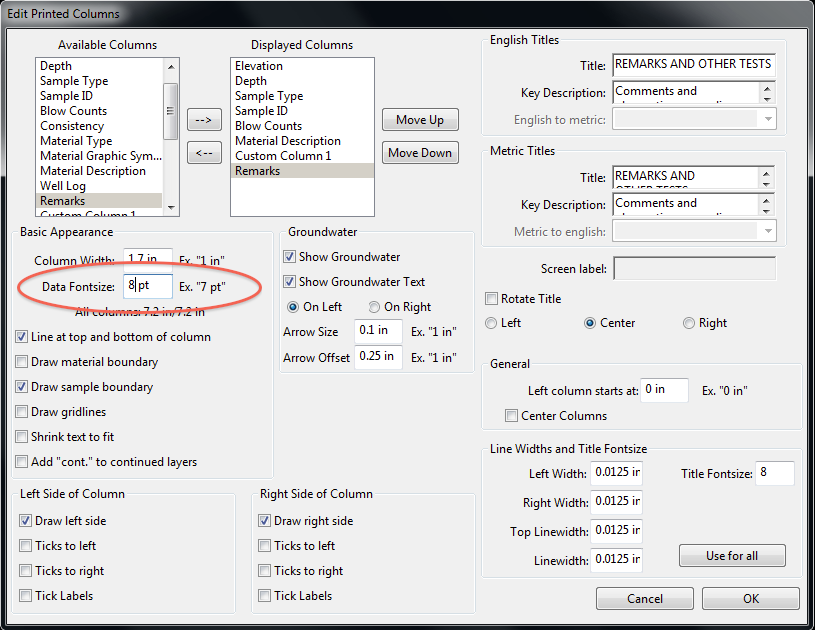
Right click on "fieldlog2.tpl" and select "Edit Columns." Under Displayed Columns, select the Remarks column. Under the "Basic Appearance" section, note the "Data Fontsize" textfield. Change this value to "8 pt" and click OK to save the template.
We need to edit the template to add a column (ordinarly we would have done this in the same step as fixing the font size, but as this is a tutorial we are splitting the steps). Right click on "fieldlog2.tpl" and select "Edit Columns" to bring up the column editor.
Note that in the list of available columns there is a "Material Graphic Symbol" column. Double click that column to add it to the "Displayed Columns." It will appear at the bottom of the list, but we want to have it printed before the Material Description, so click the "Move Up" button until it is in the proper place, as shown below.
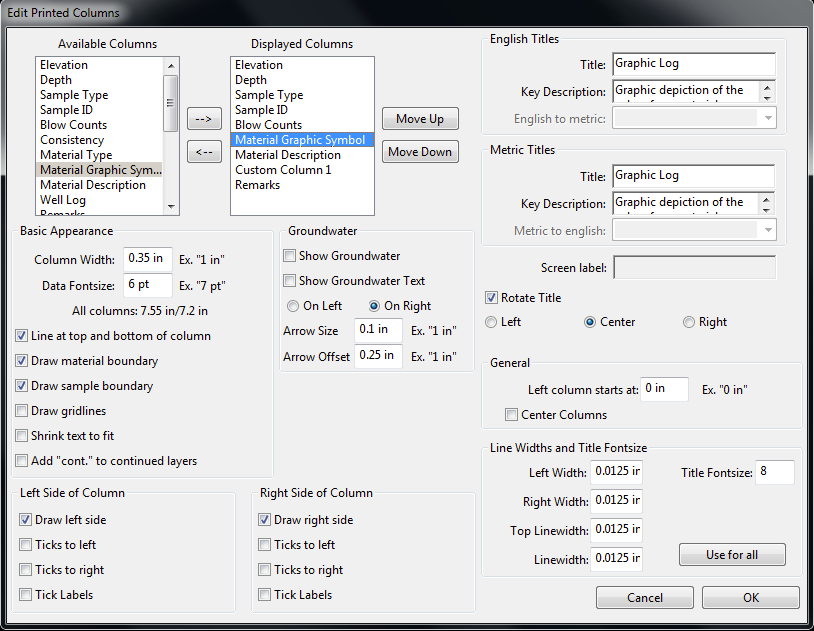
Note that under the "Data Fontsize" there is a note saying "All columns: 7.55 in/7.2 in." This is showing how wide all of your selected columns are compared to how wide your log is. Since we added the column, we are now 0.35 inches too wide for our log and we need to reduce one of the columns.
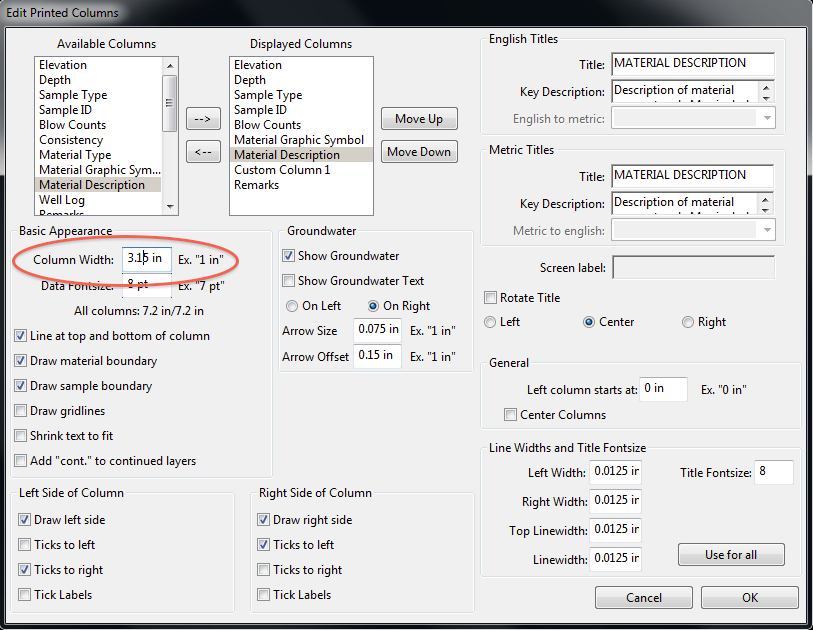
Click on the "Material Description" column, and subtract 0.35 inches from the column width (the total should read 3.15 in) and click OK to save the log.
Select the File-Print menu, or click on "Print Log" on the toolbar to generate the preview. Now you should see the corrected log, as shown below. Note that the water is now printed in the remarks column, the remark has a better font size, and the samples no longer overlap.
To print the log, select File-Print from within your PDF viewer.