Now that we are finished with the three borings for our project, it would be helpful to print a fence diagram to help visualize subsurface conditions at the site.
Start BorinGS by double clicking (or single clicking, depending on your operating system settings) on the BorinGS icon. If the software has been registered, the main entry screen will be displayed. When starting the trial version, a "nag screen" must be dismissed first.
Open the previously saved file by clicking "File-Open" from the menu, or clicking the "Open" button on the toolbar. Navigate to the data file (we called it "tutorial.bgs") and click "Open."
After opening the project file, either click on "File-Print Fence Log"to display the fence log entry screen.
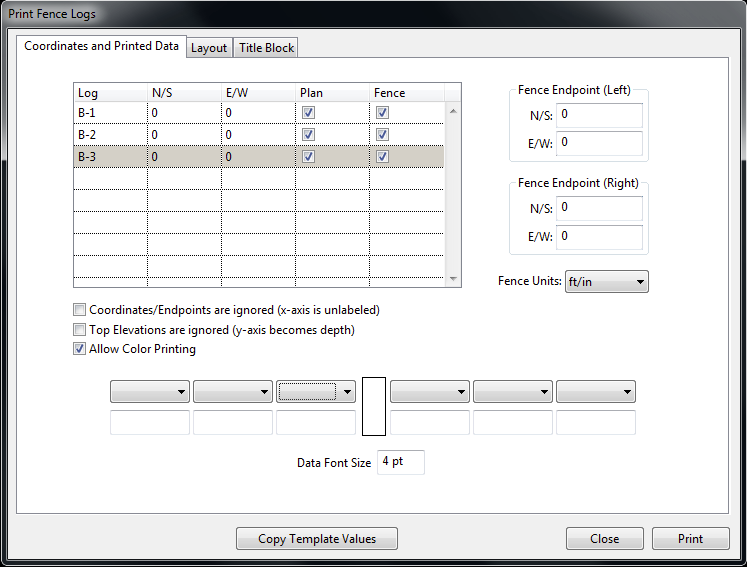
The first thing you should see when you open the Fence Log dialog is that no coordinates have been saved for the logs, and only the default fence endpoints have been set, as shown below.
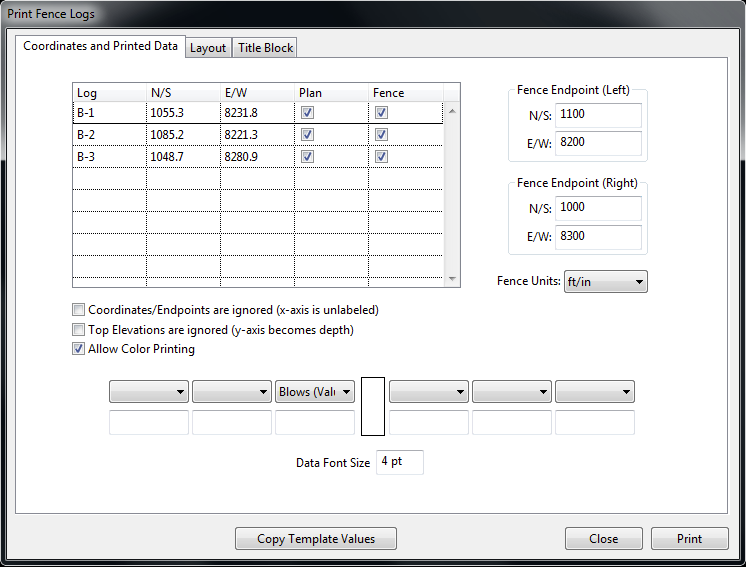
From a survey, we know that the coordinates for our three logs are as follows:
Based on these coordinates and the site layout, we have decided that the fence should have endoints of:
Enter the above data in the appropriate fields. We want all the logs to appear on both the plan and fence, so make sure the checkboxes are checked. The entry screen should appear as follows:
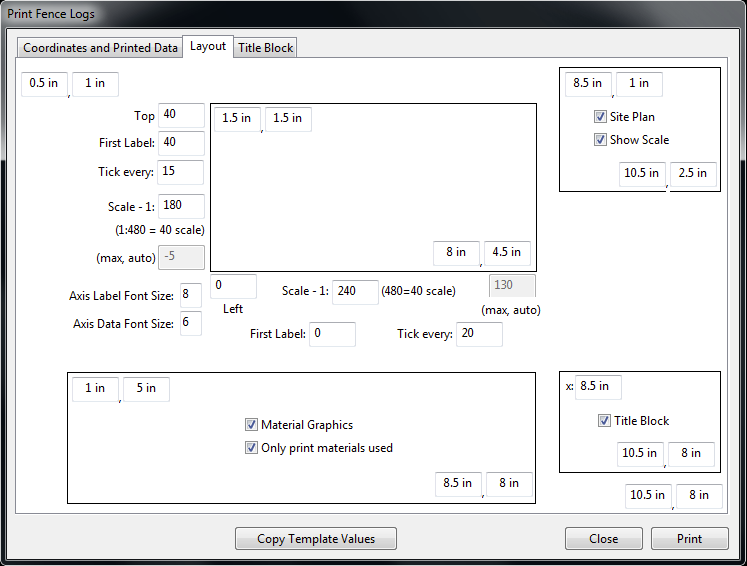
Click the Layout tab. We know the elevation of all three
logs is slightly higher than 30 feet, so we need the top value on the
y-axis to be greater than that. Enter "40" in the "Top" field, as
well as in the "First Label" field. If we don't change the "First
Label" no tickmarks will be printed above 0.
We also know that the maximum depth of the three logs is 29 feet, so we can adjust the vertical (y-axis) scale to maximize the usable area. Enter "180" in the "Scale" field, and change the "Tick Every" value to "15."
Click on the "Titles" tab, and you will see the title entry fields. Default values are stored in the template, so common values (such as company names) do not require entering for every project.
We will enter the company name and address in the uppermost box, the project name in the third box down, and enter the project and figure numbers in the boxes already designated.
Note that the titles can use special markup tags, similar to
html. For example, if you want a word to be bold, surround it
with the tags "<b>" and "</b>" (the one with the slash is
the closing tag). So to print the word "Company" bolded, you
would enter "<b>Company</b>". See the Markup
Tags section for more
information.
When we are finished entering data, the screen should look like:
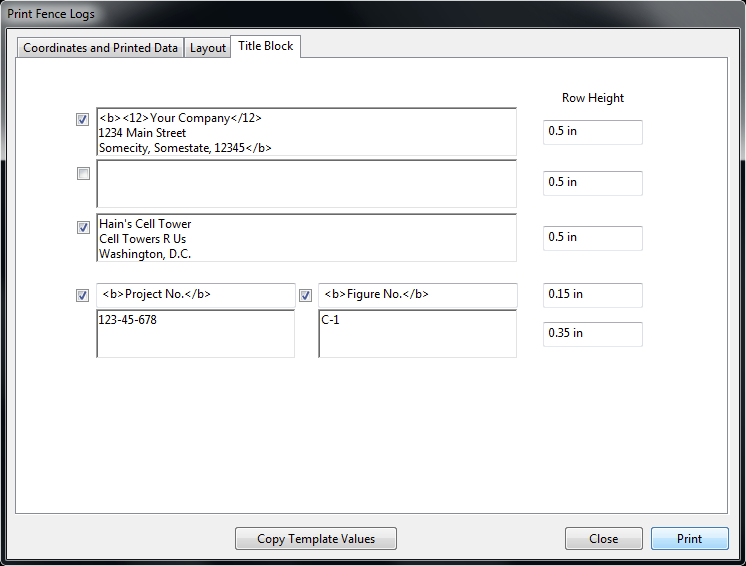
Note that in the uppermost field we have bolded all of the text, and made the "Your Company" a larger font (12 point).
Click "Print" to print the fence logs.
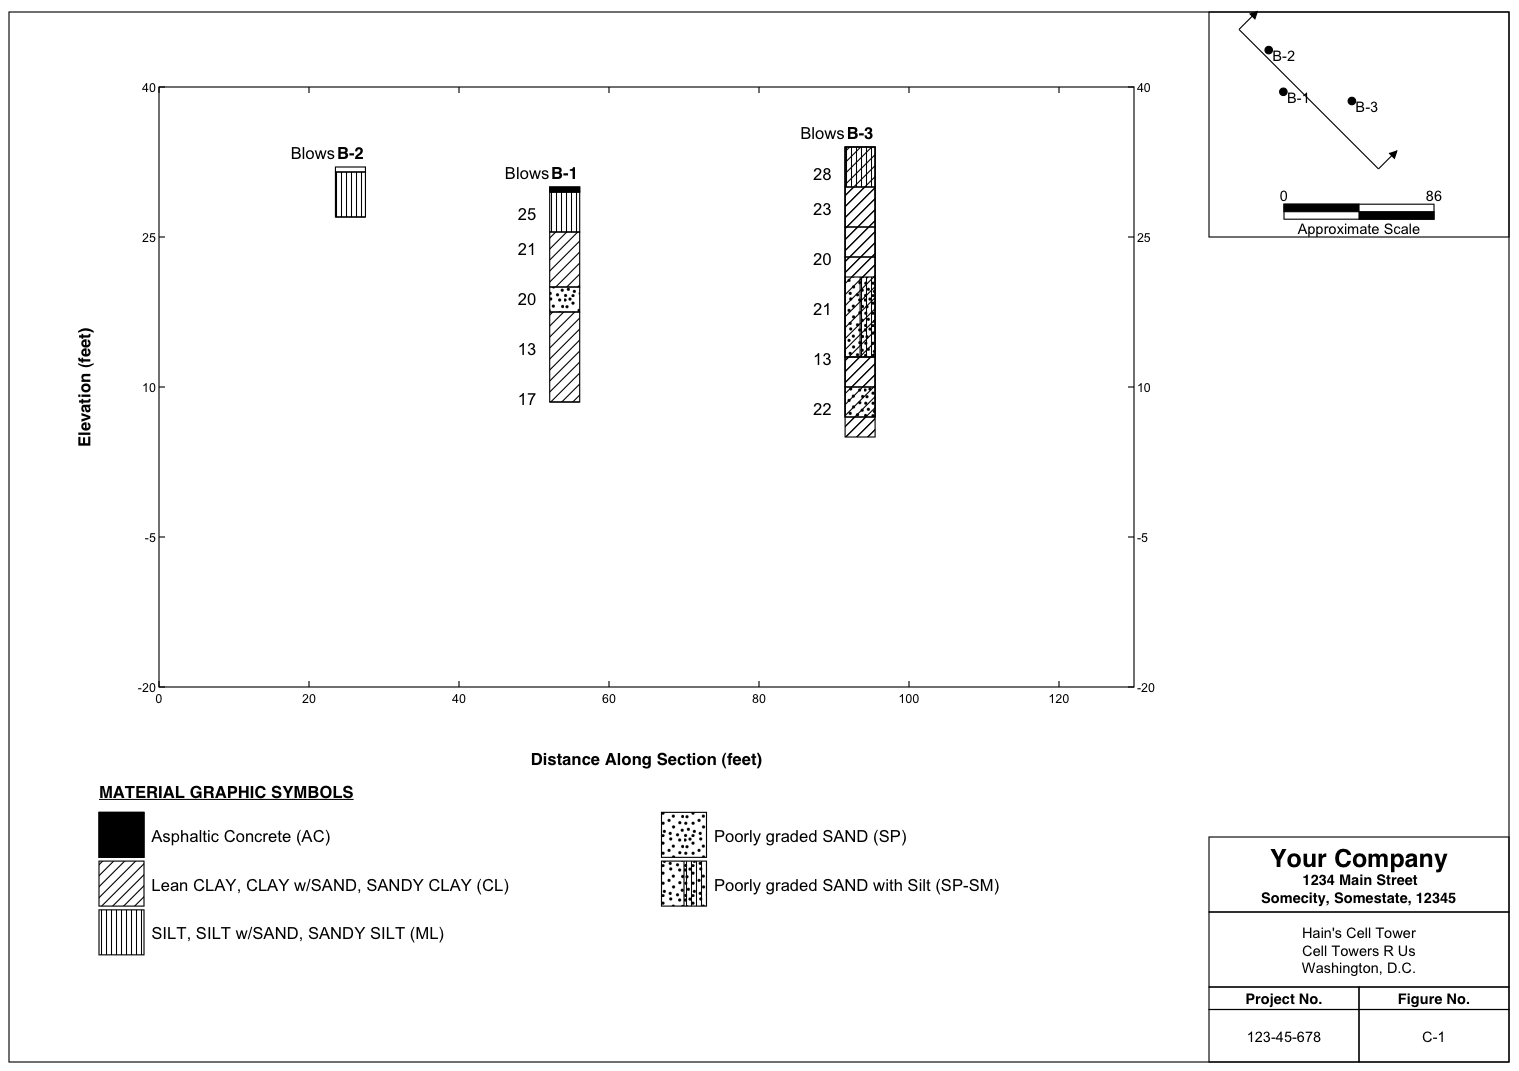
Our fence logs should look like: